The four days of my workshop was
spent in learning an amazing technique, complex and complicated, on how to make
pictures with fabric. I have been
quilting for a bit and have an understanding of some basic techniques, but this
was very different. There were 2 of us doing the workshop which was great as so
much learning takes place by observing
another work. Karen had a unique style of teaching, as, besides handouts and
constant support and advice, she also
made a small quilt and modeled a lot of the skills we were being taught!
I woke up really early on the
first day of my four days workshop, excited and eager to start. I had been
wanting to do this for such a long time! We started at 8 and worked till 5,
with a short break for a quick lunch! This was the schedule we maintained for
the entire duration and we soon realized why this was such hard work!
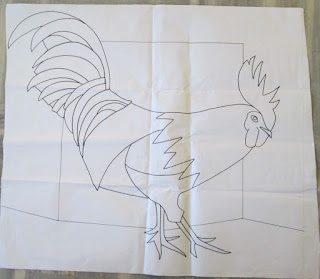
The first step was to draw a
clear line drawing of the picture we wanted to make. Karen had asked me to
choose a bird, or a fish as my first picture, as she felt this would be easier
to do than a person as a first attempt. So I chose the picture Priya had sent me
of her bad tempered cock….such a beautiful fellow though! So I made a sketch,
and then made the line drawing.
Priya's rooster and my reference picture
The line drawing
The next step was to put a
thinner paper on to the line drawing, take a ruler and pencil and trace and
square all the curves into points, and thus have an angled version of the
picture
The squared head
We then coloured
each segment into separate coloured groups, as this second drawing was going to be our
‘map’ and what we would use as reference once we started piecing so it had to
also be totally accurate.
Colouring the picture
Once the colouring was done we decided how we would
divide the picture into segments for piecing.
We then divided the picture into large working segments, numbered all the pieces in each segment and used a high lighter to mark
these segments.
Numbering
Numbered segments
We then traced another copy of the design onto another sheet of paper, and this became the piece on which we would create the colours of our picture by auditioning the right fabric! Such a super process!
Finally the drawing was
traced onto freezer paper and the pieces marked with little coloured ticks, so
that we would be able to match them while piecing! Since the marking would have to be on the wrong side, everything had to be done in reverse!!!
Finally on the last day we started putting it together! Not to mention that sustenance was always great!
4 days later


